Make Container Gardening Your New Thing and Unleash Your Gardening Potential.

For us gardening purists, there is only one way to garden. At least their was. You dug up a patch of lawn and planted stuff in rows. Then some forward thinking person, probably with terrible soil and /or back issues, thought there had to be a better way. So they made a tall box and filled it with better soil, planted some rows of stuff and relished in just how easy it was to garden that way. But that wasn’t good enough. An engineer named Mel thought traditional row gardening was a waste of valuable growing space. He went on to utilize every square foot of his raised beds and set the standard for easy to achieve, high-yield gardening. Today, the world of gardening continues to evolve.

Along the way, a small part of gardening that many of us were already doing got overlooked: containers. Maybe we had an herb or two, a patio tomato, or some cute miniature pepper plant but that was it. Never anything serious. Well I am here to tell you different. Container gardening may just be the next big thing. Why? With the rise in urban gardening and homesteading, containers are a great way to make up for a lack of space. City and condo dwellers have been doing that for a long time. There are several reasons why you should jump into container gardening or consider adding containers to your existing setup. So instead of looking down on those who choose to grow stuff in pots, I say add it to your arsenal.

Cotainer banner

Containers are a Great Beginning

If you are a budding novice gardener, or on your first gardening baby step, containers are a great way to get started. You can start slowly with just a few pots and easy to grow stuff and then add to it as you get more proficient. And should gardening suddenly not be the thing for you, then you won’t have the regret of all the time and money spent on raised beds. And you won’t have the added labor of trying to turn garden back to lawn.

I recommend starting with something easy, like lettuce or another fast-sprouting leafy vegetable. They are easy to grow and can handle a variety of conditions and it will help you gain proficiency and confidence as a gardener. Then as you get bolder, you can move on to tomatoes, peppers, even potatoes.

Containers Eliminate a lot of Problems

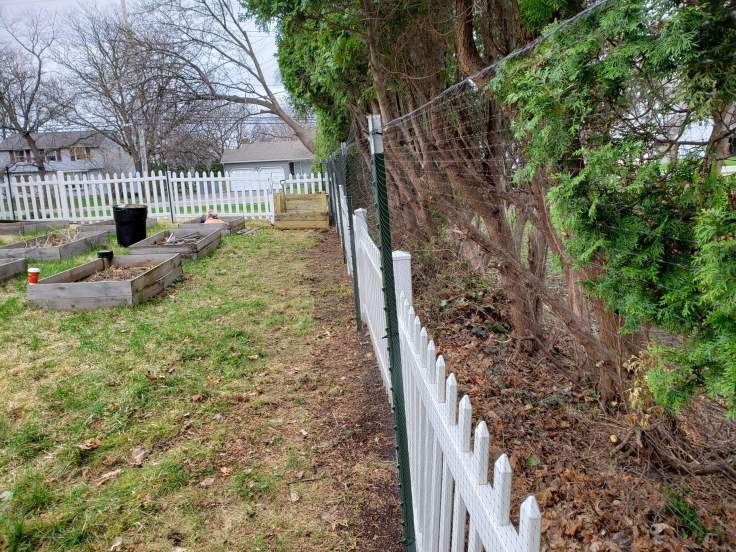
When you plan a garden or where to put a raised bed, you need to consider what you will be growing and how much direct sun it likes. Lettuce bolts easy in the heat, so having partial shade will help counter that and result in bigger leaves, but then what about the others that want that full sun? Now stuff is getting complicated…..not with containers though. Put them wherever you want and move them when you need to. Right now my patio lettuce is doing great in full sun. Once we get into July though, I will move it to a spot that gets a lot of afternoon shade. I can’t move my raised beds.

If water conservation is important to you, containers use far less water than even raised beds. Water your containers directly with a can or a wand and you avoid all that wasted water that just leaches into the water table. Some types of containers such as thin walled plastic ones, can dry out a little faster, so be aware of what you are growing in. The thicker the better. And a saucer to catch the excess helps as well especially with clay pots. The same rules apply to fertilizing containers. You need a lot less so you will save money there as well.

watering
You can get creative in your watering methods if you are imaginative and handy.

Weeding, even in raised beds is tough. No one likes doing it. In containers it’s a lot easier. Your not weeding the empty space in between rows, and if you want, put your pots on a higher surface to make it even easier. I have six pots and a planter so I just run through them quick. I pull a lot less weeds from my containers than from my beds. You don’t have to worry about tilling containers in the spring. You can either work the soil around with a trowel, or dump it out into a larger container such as a wheelbarrow, mix and re-fill.

Containers make it economically feasible to use a higher quality soil. If you want to use a high end  garden soil it can get costly to buy enough to fill your raised beds, or till into your garden in a quantity enough to make a difference.  Not so with containers. You will need a significantly lesser quantity of soil, so you can spend that savings on quality. Ideally you want something high in organic matter, maybe a little perlite and some peat. Even using this, it’s best to mix in a handful of native soil. What you want are those beneficial microbes that sterilized bagged soils won’t have.

Container Gardening for Kids

Growing stuff in containers is a great way to introduce your kids to growing their own food. How many of us grew stuff in cups or small pots as a project in school? We did beans. A decent sized pot, some soil, and a seed or two is all you need. You can’t tell me they won’t anxiously be checking every day to see if the seed sprouted, or measuring how much taller their pepper plant is today than yesterday. Children learn to care for things, it teaches responsibility and patience and is a great way to teach them a little biology and love of nature along the way. Your children get to see where food comes from, to a lesser extent.

Keeping Furry Pests Away

Growing things in containers can put them out of the feeding range of may smaller pests. Bigger pots ensure that further still. I had my lettuce ravaged last year, along with my spinach. If I wasn’t such a fan of Watership Down, I might have taken steps. Since I switched to pots and moved them to the deck, nothing has bothered the rather abundant lettuce crop I have growing. Not even the deer.

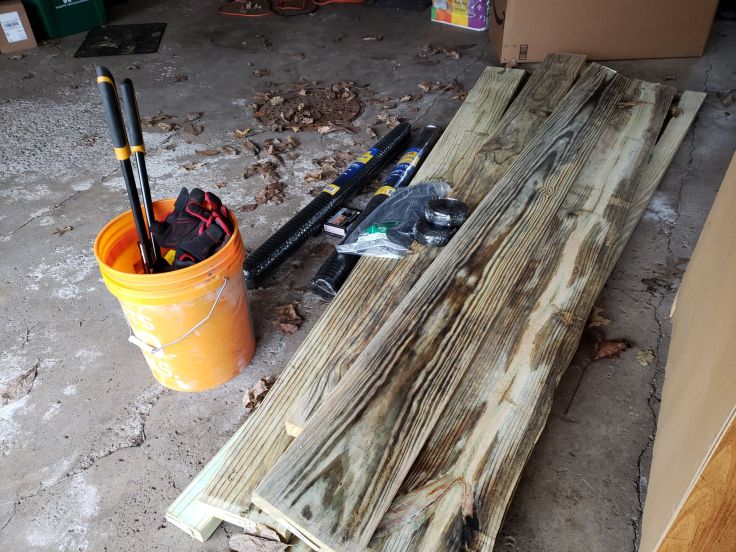
Are there downsides? Sure. Containers can dry out fast, or drain poorly. Large plants will need large pots and that can get heavy. High winds can knock stuff over. But the good outweighs the bad as long as you use quality pots, know the peculiarities of what you are growing, and manage your risks. Enjoy and explore the possibilities of this option. It can expand your gardening possibilities.

If you don’t try, you never learn.

pro tip


Tomatoes and Tilling

Tomato Status: Excellent

Despite the setbacks for the cold, the tomatoes are flourishing. They are almost a foot and a half tall. Color looks good. I removed all the yellowing, cold-damaged lateral stems.  I would say I am on track for where I would normally be this time of year, which is a little surprising considering the long, drawn out cold spring we have been having. But lot’s of sun and a few hot days and the tomatoes have bounced back in fine fashion.

Yesterday I weeded all the beds and gave everything the first shot of Espoma Garden Fertilizer. Today, I went through the plants and pinched off the small flower buds that were starting to set. It won’t affect the quality or quantity of the harvest. Plants can’t expend energy in too many directions at once.  So by pinching off the flower buds, the plant will shift gears to green growth instead of fruit production. More flowers will come, but until I think they are ready, no flowers. This is gardener’s version of responsible parenting. I also went through and removed all of the suckers where lateral shoots come off the main stem.  They can have a tendency to retard growth if left unchecked. And if you can successfully root them, they are a ready made plant.

20190602_162017

Today I also started tying up the plants as well. You have a lot of options with tomatoes. You can stake them, cage them, weave them o a wire, or just let them sprawl out. I choose to stake mine. It works better with square foot gardening. Over the years I have used a variety of tying options from jute twine to wire , electrical zip ties and kitchen twine. What I found last year was something that works better than all of that. Elastic. Just a plain old elastic band like the type you wold use for sewing. I bought a roll of 3/8 inch elastic at Walmart for just a few dollars and it goes a long way. I tie the stems loosely using a square know and leaving just a little room. As the stems thicken and move around, the elastic will stretch and flex with them without any damage. Especially when it gets windy.  It cuts and ties easily. The only downside is that you can’t compost it. So either you untie it and save it, or do what I do, cut it out with scissors at the end of the season and throw it away.

20190602_161429

To Till or Not to Till

Finally, I would like to close out by bringing up a topic I have seen discussed a lot lately. Tilling or working the soil. The current and trendy view is that this shouldn’t be done because it damages the mycorrhizae which exist in your soil, and in damaging them you hurt the soil as a whole over the long term.

fungus 1

The mycorrhizae are those tiny little fungi that inhabit the soil and latch onto your plant roots in a complex symbiotic relationship. Plants can easily absorb water, but not so easily absorb most nutrients. The mycorrhizae need sugars that soil doesn’t provide. Thus a partnership is formed. The fungi latch to the plant roots and help the plant absorb those nutrients and the plants provide them with sugar. This is the complex interconnection of nature in action.

The along come the humans. We break up the soil to some extent in order to make soil easier to work, add in amendments or simply to till under a cover crop. It all amounts to the same thing. Some amount of damage is done to the beneficial fungi. But I believe that extent is a bit exaggerated by the “no till” permaculture crowd. There are several reasons why I think this is true, but mind you these are theories based on what science I do know.

If you remove the plants, roots and all at the end of the season, you are basically cutting off the fungi’s food supply anyway. But don’t worry, unless you are sterilizing your soil between seasons, those fungi have inoculated your soil with spores. Spores which hang for the next season waiting for another plant to bond with. This will be especially true if you’re a heavy user of compost or have a garden soil already rich in organic matter. Rich, well drained soil will help the mycorrhizal layer quickly re-establish itself.

The “no-till” viewpoint gives too much credit to these fungi for being able to overcome terrible soil. If you have that dreaded heavy clay, or soil so sandy it holds water about as effectively as a colander, then you need to amend it, most likely for several years in order to get it where you want it. The fungi that help the plants don’t really improve the soil. That’s not their function. So in this case the benefits of tilling or mixing in amendments, far outweighs the damage done. Your fungal layer will more quickly establish itself the better your soil gets.

There are several fungal inoculants you can buy to aid you in re-establishing the beneficial relationship. I can’t speak as to their effectiveness as I have never used them. I would suggest trying it out o a small scale and see how that does versus a non-inoculated section. Where I can see these inoculants being most helpful is if you are starting plants from seed in pots or trays and you are using sterilized soil. The sterilization process may have destroyed any mycorrhizal spores present. The seedlings will not need these fungi when they initially germinate. But as they quickly mature and develop roots  here it will make an impact with faster nutrient uptake. In theory this could mean you enter warmer weather with bigger, healthier transplants who already have an established root/fungus relationship to bring to the garden with them. Hmmmmm. This sounds like something to experiment with.

That’s all for now. The warm weather is upon us. So get out there and enjoy it. A bad day out in the lush green beats a good day inside anytime.


Cold Spring: Gardening in Cold Weather

The official first day of spring was Wednesday, March 20th. By the weather we have been having, you would think it was yesterday. The cold, dreariness of winter slogged on. Sure the snows melted, and the ground thawed. But until recently, that’s about all we can say has happened. April was drier and colder than usual, leading to a bleak, cold and wet start to May. We have had a few days of promising temperatures so far. But this time  they seem like aberrations, rather than the gradual warming trend we see going into May.

May is usually that month where upstate New York gardeners are feeling confident about the danger of frost being behind us, and we wait patiently for a few weeks for our soil to get warm enough so that our seeds will sprout and our transplanted seedlings thrive. Not so much this year. The weather has been terrible. While we had a good day here or there, nighttime temperatures have been dipping into the low forties, and occasionally high 30’s. In fact as I write this, it’s expected to dip to 42 degrees tonight.

I had a ton of seedlings ready to go. I had pots with lettuce loitering around inside waiting to go out (the dog kept eyeballing them, she has a taste for romaine…). I had a transplanted fig and several raspberry plants that needed to get put in the ground as well. Only the weather was stopping me. I wasn’t too concerned about sowing seeds at this point. All of my slower growing plants, like peppers, tomatoes, kale and brussel sprouts were putting on size, and I had to transplant them from starting cells to 3″ pots.

So on a nice day last week, I decided to start the hardening off process. If you have never done this, it’s the process of giving plants started indoors time to acclimate to being outside.  Plants started under grow lights in stable temperature will burn up, die back or otherwise wilt when exposed to the harsh temperature fluctuations and glaring sunlight of the great outdoors.

So my plan was to put them outside during the day on nice days giving them a chance to adapt. After a few days of this, I made the decision that they were ready. My arrogance and impatience would prove costly. But I forged on anyway. The first cold night outside, I dug a pit in one of my raised beds, dropped a storm window over it for a cover, and housed my plants in the improvised cold frame. This is where it started to go bad. The first few days they were in the frame, it was clear and really sunny, but temps were barely in the 40’s. I wasn’t concerned because I had been monitoring the bed temperature and it was staying around 50. But I failed to consider the effect of the sunshine through the glass. Almost everything in the cold frame got scorched being under clear glass. Not fatal, but decidedly ugly.  Thankfully, they have strong roots.

Last weekend was sunny and warm. I took advantage of that to get all of my raised beds tilled, and with a few days of decent weather on the horizon I decided to plant my potatoes, all of my transplants, and sow the remaining beds. I mean it was 60 degrees, almost mid-May. Safe space right? So I removed my wretched looking transplants from, the improvised cold frame and got them into the ground. I figured this would give them a measure of protection. WRONG AGAIN.

The temperature snapped back down. We barely made it into the 50’s here during the day, and back into the low 40’s most nights. At this point I think the transplants were hardened off enough that they just accepted the suffering. Poor little things. They are ugly looking for sure, with their  scalded leaves and withered appearance, but they are gamely hanging on. As you can see below the next few days things seem to be picking up.

Resized_Screenshot_20190517-082329_NOAA_Weather_Free.jpeg

I am hoping that being planted in good soil, some warm sun, and decent average temperatures will snap them out of their sunburnt funk. A shot of organic garden fertilizer will help too. I will give the a few weeks to snap out of it. If they don’t I need to consider replacement options. On the plus side, my potato seedlings are already showing above ground., and I saw some bean sprouts this morning. My brussell sprout transplants appear to be indestructible. Not a mark on them. And above all else, my lettuce which has lived outside in pots for weeks now is loving life. In fact it’s doing so well, I started two more pots of romaine.

4367081b-02ca-45e7-87c4-8fc9dfc02418

This entire fiasco has taught me three things. First, I need to stop screwing around and build a few proper cold frames before fall. Second, I am considering black plastic to warm the beds faster, and to keep it on until late may with the transplants. Last, I need to be more patient. Not having a cold frame ready, I should have just made a home for everything in the unheated garage. It would have blunted the worst of the cold.

WELL, LIVE AND LEARN. Another update coming soon as things progress.

Spring relentlessly pushes forth and my green soul longs to keep pace.

Coffee in the Garden: Enjoy it Twice

I love coffee.

Many of us love coffee.

We all love gardening so…………..

I enjoy nothing more on summer mornings than sitting on my deck, sipping a warm cup of coffee, enjoying the quiet sounds and watching the world come alive. I look out over the garden, smell the fragrance, listen to the birds and just enjoy the moment. A lot of coffee gets consumed in my house. I also have a lot of garden beds in need of good compost. So I take advantage of this ready source of nitrogen and add coffee grounds to my compost. In doing so, I get to enjoy the benefits of coffee twice.

How good of a source of nitrogen is it?

Used coffee grounds are an excellent source of nitrogen, and a few other nutrients and minerals. Depending on which scholarly article you read, coffee grounds are somewhere around 3% nitrogen by volume. So on it’s own, coffee grounds would read as 3-0-0 for NPK. They do also contain potassium and phosphorus, but generally less than 1% by volume. 3% isn’t too shabby. Now coffee alone shouldn’t be your only source of nitrogen. But when added to compost bins, it creates another diverse source of nitrogen for you.

compost grounds

Why wait then? Why not just add it straight to the garden beds?

You can add your grounds directly to the garden soil. However, the nitrogen in coffee grounds is not readily available for plant uptake. The grounds have a carbon to nitrogen ratio of about 20:1. If you remember your rule of thumb for compost breakdown, then you want that ratio closer to even. The coffee grounds are an available source of food for beneficial microbes, but that process can rob the soil of it’s existing nitrogen. So you can add them, but you will also need to supplement with additional fertilizer, so whats the point? Eventually when the coffee grounds break down, they will provide nitrogen, but that takes time and could represent a good portion of your growing season. You should not  expect any results right away.

But coffee is acidic……

Adding spent coffee grounds to your soil, or using compost of which they are a part will not make your soil more acidic. Used coffee grounds have a pH of between 6.5 and 6.8. That is slightly acidic, but pretty close to neutral. The brewing process removes most of the acid from the grounds because it is water-soluble. Your coffee ends up being acid and the grounds neutral. So don’t be scared by this urban myth. It’s based on only knowing half the info. This all being true, fresh ground coffee poured around your hydrangeas and watered in, should in theory cause a color change. I have never played around with it, but it sounds like a fun experiment.

Where to get the grounds

20190426_172951
Kitchen grounds bucket with some vegetable scraps in it

If you drink coffee, you have grounds. But that alone may not add up to enough to be meaningful. Luckily for us, there are a lot of other coffee drinkers in the world. So there are lots of grounds available. There has been a lot written about making deals with coffee shops, convenience stores and the like for their grounds. They almost always have coffee brewing, and they produce a lot of grounds. But realistically, they don’t want a stinky bucket of used grounds underfoot. So you can ask, but you will need to stay on good terms with them. Try smaller, boutique coffee shops. They generally thrive on being environmentally friendly, and may jump at the chance to help you out.

free grounds

Friends and neighbors are always a good source too. Especially if they share in the bounty of your harvest. This way you can sell it as they are really helping themselves by helping you. If you are brave you could leave out a bucket, pail or tote with a sign, but who knows what would end up in it. I leave that to your discretion.

I have discovered a gold mine of free used grounds. Work. We plow through coffee at work. Most offices do. Last spring I put out an empty #10 coffee can with a sign on it explaining why I wanted them. It was a hit. I was lugging home two of these containers a week. The cleaning lady even helped me out because in case you don’t know, wet coffee grounds are heavy. So I effectively removed over 10 pounds from the trash for every can of grounds I took home. It didn’t take long to fill a 60 gallon Rubber-made tote.

This year I decided I didn’t need that much. So I settled on an alternative. Like many offices, the traditional coffee maker setup is being slowly phased out in favor of Keurigs. No more buckets of grounds. Now I get bags of spent k-cups. I sent out a email to everyone in my general vicinity at work, and told them why I wanted the grounds, and that I had a bin labelled for used k-cups in my cubicle.  All it took was a waste bin from an empty cubicle and a label maker, to be in business. Once a week I get a decent sized bag of k-cups to bring home.

20190420_100712
K-cups from work being processed

The down side of this is, that it requires some processing on my end. You just take a knife, run it around the foil rim, peel it back, then once around the inside to loosen the grounds. Give it a tap and out they come. K-cup grounds are a finer grind. So per unit of volume you get more coffee grounds than traditional grounds. The finer grind should also help with the breakdown process, as a finer grind has more surface area. More surface area makes them more chemically reactive.

So consider this resource when you are hunting for things to compost. When organic matter like coffee grounds gets to a landfill, it gets buried and decomposes anaerobically. That means it produces methane. But by composting you help eliminate this source of green house gas. So all you organic gardeners, urban homesteaders and mad scientists need to take advantage of this resource.

Stay green. Help the planet and in turn help yourself.

A parting word of thanks to all you new subscribers. I am touched by the fact that you liked what you read enough to subscribe. I will keep trying to turn out qualify content for all of you.


Spring Garden Preparations Continue

I had such plans for last week and this weekend. Our growing season is short here in upstate NY. Because of that, savvy gardeners like to hit the ground running as soon as it gets warm enough. I have the normal list of stuff to do such as work the beds, transplant seedlings to pots, etc. Additionally, I have an ambitious list of outdoor projects that I want to get done as well before the growing season gets underway. Some items are necessities, some are “nice to have’s”. Either way, I need nice, or at least tolerable weather to get it all done.

Resized_20190420_100724

Towards the end of last week, it started to rain and got cold again. Not exactly what I wanted because I had taken apart the almost 100 feet (30 m) of vinyl picket fence that was slowly being pulled down by creeping English Ivy. This Ivy had been planted in the cedar hedgerow along my southern border and just left to it’s own devices for who knows how long before I bought the house. It grew through the fence and into the lawn, in the process applying so much downward pressure on the fence, that it shattered the plastic clips that hold the sections to the posts. My only choice was to yank the fence sections out, prune back the ivy, then reinstall the fence sections using new hardware.

I could have let this go, but I have a deer problem and a dog problem. Deer want in, dog wants out. So I decided to solve both by installing plastic mesh deer netting. This would make the broken down fencing inaccessible, so the ivy/fence issue had to be dealt with first. I was not kind to the ivy……if anyone tries to sell you on the idea of a few flats of Ivy as a ground cover or border, or anything, just know that it needs to be constantly contained. And it will grow underground and pop up in other places. So you think you have it under control but you don’t.

I was also anxious to upgrade my compost bin in order to take advantage of the debris from spring cleanup as a potential source of compost. But given the location of the bin, the deer meeting had to go up first. So as you can see the ivy and fence issues were in the way of pretty much everything. To top it off, the weather was wet and cold. I needed a better option, but waiting for one would not help.

No secrets here. I sucked it up every decent, passably dry hour I could find until I beat back the ivy, and got the fence back up. Slammed home a bunch of 7′ metal T-posts I purchased at Tractor Supply and hung that netting. Hanging deer netting is no fun. It snags on everything. At one point I was like a salmon caught in a gill net. But you need to be patient, careful and deliberate. I still have a few hundred feet to go, but the hardest part is done.

Resized_20190421_143029

That was enough to then allow me to build my new compost bin. I already had a 4 foot (1.2 m) by 4 foot square made of 2″x 8″ lumber. My goal was to use that as the base and extend up so the bed was 32 inches (81 cm) tall sides and back, yet only 16 inches (40 cm) in the front to allow for easier working. I built this monster about 10 feet from the beds current resting place. And I grossly underestimated how much this beast weighed when assembled. Pressure treated wood is heavy stuff, and only handling one cut piece at a time, I didn’t consider the overall weight until it came time to re-position it. That took a combination of brute force and ingenuity, but I got it situated and I am a lot happier. My co-workers have been donating coffee grounds and between that and the yard waste I will generate form cleanup, I have quite a few sources of carbon and nitrogen and I expect to create black gold with this new setup.

Resized_20190421_143011

During the wetter hours, I managed to get most of my seedlings out of the 6 packs and into some larger starter pots. Even though I re-potted my peppers, they are still sitting on heat mats for another week. Everything got a small shot of fertilizer as well. That will help with the transplant shock. But the hardening off process has begun. My Viollete de Bordeaux fig has started to leaf out, so I potted that and it now lives outside. Soon it will go to it’s permanent home in the yard.

All told, it was a productive weekend despite the crappy weather. Sometimes you just have to suck it up and will yourself to get stuff done. Had the weather been sunny and dry, I would have gotten the garden area mowed out as well, maybe gotten some additional deer netting hung. But I am happy overall with what I have so far.

Find your motivation, make your own Eden.

Let the thought of growing things move your hands to action.

Growing Degree Days: Unlocking The Timing Of Nature

Adopt the pace of nature; her secret is patience.    (R.W. Emerson)

I want to take a minute to talk about a little known and seldom used topic: Growing Degree Days (GDD). A new topic for many, or an old topic just called something else depending on where you live. We all  know at least one piece of folksy garden wisdom such as putting down crabgrass preventative when  the forsythia bloom.  There are tons of little “tips” like this out there. Most of them actually based on science, even if most of us didn’t know it. So GDD is worth taking a minute to talk about.

So What are they?

Basically, they are a measure of heat accumulation to-date for the growing season. It is a tool used in phenology, which is basically the study of plant and animal life cycles. Tracking GDD allow you to predict plant, animal and insect development. These things are biologically timed to enter certain stages at certain times, often based on GDD. So forget about your calendar. Nature has it’s own, and it cares not for our man-made creations.

Growing degrees are calculated when the temperature goes above the base temperature, usually 10 °C. The actual formula is a little more complex because it requires taking into account the high and low temperatures. Then there are formulas for determining cumulative GDD, not just for a single day. The good news is , you don’t need to do math.

seed

Why Use Them?

If you are a serious gardener, urban homesteader, or even someone just getting started, tracking GDD is something you need to consider. Why? Because as I mentioned earlier, nature keeps it’s own calendar. Some people may go out and do the same things at the same time every year, and get lucky as a result. But why not do things at the proper time, when conditions are optimal and you get the best results? From an integrated pest management and organic gardening standpoint, it’s worth it. Using GDD to time fertilizer and pesticide applications maximizes results. That saves you time, money and reduces chemical usage.

Getting it right the first time is important with plants. As many of us know, depending on what you are growing, you only get one chance to stop an infestation, block a fungus, or correct a nutrient deficiency. Watching your GDD, and knowing what is coming next can really give you an advantage.

caterpillar

Where Does One Get This Helpful Information?

I told you earlier, you won’t need to do math. You can if you want to, but there is an easier way. For those of us here in the states, it’s simple. Every county has an extension service , every state has its own friendly department of Agriculture who track this data for local farmers. But this data is just as helpful to the gardener as it is for the farmer.

This is the web page for the station nearest me, our local agricultural service has a monitoring station at a local apple farm. Here I use a “base 50” scale. Which calculates GDD using a base temperature of 50 degrees Fahrenheit:

NEWA Cornell at Orbaker’s Apple Farm

I visit this page weekly through mid-season. They have some helpful guides as to what pokes it’s head up when. So I know when to start looking for certain pests. The best defense is when you know exactly what the offense is going to do.

So take advantage of the hard work others are doing. Most of it funded by your tax dollars anyway. You will be the local garden wizard who always seems to know what is going to happen before it actually does. Whether you choose to share your secret is up to you.

Happy growing!


Growing Lettuce Indoors: The Basement Lettuce Experiment

My experiment with growing lettuce indoors from seed is progressing nicely. I posted once before about why I decided to do this, so I won’t go through all that again. I am happy with where things are right now. So far it’s been pretty easy.  I feel I should have done this much sooner.

So everything has been transferred to clay pots for a few weeks now. The romaine has started to darken a little and is now starting to show some size. It’s about 5-6 inches tall now. The red butter lettuce is starting to spread out a bit. I have never seen it mature. When I planted it last year, the critters got to it. So I am not sure of the final size, although I must admit I bought it on a whim just to have a little variety and didn’t do much research. I do have one stunted plant. Not sure what’s going on there. I gave it a little tug to check root development and it didn’t seem to develop the roots the others did. It’s still hanging in there, so I won’t get rid of it yet.

I think I am to the point now where they can come out of the basement and up to a sunny location. Outside is not an option for at least another 4 weeks, a little less if I protect it somehow. The trick is to find a spot in the house with enough sun, out of reach of the dog. She has a taste for romaine and pretty much any leafy green.

While we are on the subject of plants being started in my basement, I would like to introduce some new members of the 2019 Garden family, just arrived from Burpee.

On the left of the first photo is a Bristol raspberry, to the right of it, a Violette de Bordeaux fig.   The photo on the right are a variety of heirloom raspberry. A quick word on the fig……It’s supposed to be hardy for my growing zone. It’s a bush, not a tree, that grows 6-10 feet tall, is supposed to be a prolific fruiter after a few years growth, and the fruit is reported to be very sweet. A caution should be sounded here, that Burpee recommends netting to keep the birds off it. Now, look at the little tiny rooted cutting in the 3″ pot Burpee sent me. That cost $20.00. I would have sought out a better option had I known that is what I would get. Here is a fully grown specimen:

Violette de Bordeaux

I think it may take a little bit to get there. But I want to see how it goes. I may end up planting a few since I have a big open sunny space. Excess fruit can be dehydrated so I don’t worry about overproduction.

Well, that’s it for the update. Greener days are coming. The warmer weather has me aching to be outside. I caution myself with the fact that we were blanketed with snow when I got up on April 1, so conditions are still subject to sudden change here.

If you like what you see here, subscribe. Spring is in the air and new material will start coming faster now that there is so much good green stuff to go see and do. And for those of you who have already, thank you.

The Case for a No-Mow Lawn

If you own a home, to some extent you have a lawn. For many of us, a lawn is a source of pride. Here in the suburbs, rows of manicured lawns lend consistency to our shady, tree-lined streets. The front of the house has always been a sense of pride for homeowners. It’s our showplace. We manicure the turf, weed, spray, edge , mow, trim and otherwise fret away our summer Saturdays making sure everything is squared away. Your front yard is your first impression. It can say a lot about you.

But what about that one person down the street? You know the one. Where the lady in the straw hat and crocs is always weeding some patch of flowers, in that jungle she calls a front yard. As much as it bothers you, it most likely bothers you because it isn’t the same as all the rest. Not because it is ugly, but because it isn’t. Some people it seems, are willing to break the mold. To boldly go where no one mows anymore. I am talking about the no-mow lawn.

Traditional turf has been replaced, and endless possibilities have been discovered. Instead of a traditional expanse of manicured green carpet, let stone, mulch, beds of flowers, clumps of perennials, shrubs and even vegetables rule the landscape. Your entire front yard is now transformed into a giant landscaped garden, as unique as the homeowner wants it to be. There are a few different paths to take here. Either just plain and simply stop mowing your existing lawn, or a least a part of it, and let nature take it’s course. Or your lawn gets turned into planted beds.

Standing Out

There are benefits to doing this. First, you stand out. If done right, your home will have “pop”. People will walk by, just to look at it. You get included in local garden tours, and it is just plain and simply enjoyable to look at, and ever changing as you progress through the season.

Conserving Water

Also, if you live in an especially dry, arid zone, an established no-mow lawn despite all its lush greenery, will require significantly less water. Which is very helpful if you have water restrictions and its also less work for you. Watering a no-mow lawn also produces much less run-off that just ends up in your storm sewer system.

run off
Irrigation run-off on a traditional lawn

Expand Your Growing Space

For all you avid vegetable gardeners who have run out of space, no-mow lawns present an opportunity: Front Yard Vegetable Gardening! A lot of vegetables, especially the leafy ones, make attractive landscape plants. Why not decorate with them? Move that Kale out front to make room for more potatoes out back. Rainbow Swiss Chard grouped together can make an attractive planting instead of hostas. There are lots of possibilities here.

Front-Lawn-Vegetable-Garden-Design.jpg
Edible front yard

So What’s the downside? There are a few, and carefully consider each before you dive headlong into something like this:

  • Work
  • Municipal issues
  • Impact on selling your home

It’s a lot of Work

sweatig 2

Despite it’s really cool appearance, in some cases it can be more work than the lawn was. It will of course take a lot of labor to establish. But the remember, unlike grass that you just basically mow, all those lovely perennials, bulbs, vegetables, shrubs and cutting flowers have individual needs. There are different times to prune, fertilize, pests to fight, watering and a host of other unique factors. If you like gardening, this is not much of a down side, and in many cases, much more enjoyable than schlepping a lawn mover back and forth. So I wold say this one at least balances out.

Municipal Issues

The nail that sticks out usually gets hammered. That’s true with your lawn as well. Check your town regulations. Especially if you want to just stop mowing all or a portion of your lawn. In most cases they can legally deem you a nuisance and fine you or more. I used to work for a landscaping contractor who did jobs for the town in those instances. If the town deemed your property a nuisance, and you did nothing about it, we showed up and did it for you. Then we billed the town, who in turn billed you. There are ways to get around this. But start by knowing your rules. The internet is rife with stories of this happening to people. 

no mow unique 3
These people had to fight the town to save their lawn

Impact on Selling

Not everyone appreciates the growing world as much as some of us do. If you plan on selling your house in the future, something like this may not exactly be a selling point. There are exceptions, such as a a Victorian -style house set close to the sidewalk. Something that is usually in keeping with several other houses in the neighborhood.

victorian

Most potential buyers may see an overworked, heavily designed front yard as a negative. Or at the very least use the potential cost of removal as a bargaining chip. But that is your decision in the end. Don’t let yourself be talked into it by a realtor as soon as they see your house for the first time.

My Approach to the Concept

I like this concept. But I am literally going to play both sides of the fence with this one. I have a nice front yard, and I sit on a corner lot. I even pay someone to care for it. My back yard is separated by a white picket fence. It is the back yard where I decided a while ago to apply the no-mow concept. Starting this spring, I intend to turn the back yard into a series of gardens and functional areas connected by a meandering stone pathway. A sizable piece of my backyard is already taken up by a deck, the vegetable garden, a brick patio that needs to be re-leveled, and a nice magnolia tree. I think those things make for good bones to design around. And I relish the thought of sitting on the deck on summer mornings, drinking a warm cup of coffee and looking out over the gardens, admiring their colors, textures and shapes. To appealing to pass up.

Seed Starting Update for 2019

The seeds have arrived. The plans are drawn up. And last week the first stage of the 2019 garden season began. I started seeds! I knew how many plants I wanted this year, so I made my list, and selected things for early starting that I knew needed to be started indoors, or were something I may have had a problem with in the past. My secret weapon this year is heat mats. I should have used them last year, but I thought my basement was warm enough and boy was I wrong.

So this year I ordered some off Amazon. I planted a week ago, and what a difference. I already have seedlings. If you were considerering using them, I would highly recommend it. They don’t cost much and the results I saw speak for themselves. Before I get into what already sprouted, here is what I started:

  • Swiss Chard
  • Kale
  • Jalapeno Peppers
  • Ancho Chili Peppers
  • Sweet Chili Peppers
  • Chinese Giant Bell Peppers
  • Intruder Bell Peppers
  • Sweet Chocolate Peppers
  • Olympian Slicing Cucumbers
  • Calabrese Broccoli
  • Mango Hybrid Melon
  • Cherokee Purple Tomatoes
  • Brandy-wine Tomatoes
  • Sweet Cherry Tomatoes
  • Steakhouse Hybrid Beefsteak Tomatoes
  • Green Gem Brussel Sprouts
  • Tango Celery

Seems like a lot doesn’t it? But I only planted 3 cells of most of those. I scaled it back based on my notes from last year. There is still an entire group that will be sowed outdoors in May, such as Sweet Corn, squash, beans, basically the easy fast germinating stuff. This year, because I ordered seeds, potatoes and some plants, the order is staggered. The seeds came about 10 days ago. I expect the tubers next, then the plants (raspberries and a fig), and last will be the sweet potato slips.

Right now I have sprouts on the kale, chard, brussel sprouts, tomatoes and cucumbers. So I am looking for a cheap source of small plastic pots to transplant them into. They will develop better i pots then left in the starter cells, even though I use deep cells.

20190317_074459My enthusiasm seems to grow along with them. One thing I did notice is that the heat mats require more frequent watering. Not a lot, but noticeably more than last year. I am okay with that. I tend to it all daily, like an impatient, hovering parent. I expect in another 10-14 days, maybe a little less, I will start seeing peppers. Peppers were a hard spot last year. It took a log time because my basement was so cool. The plants were small when I moved them outside, and were stunted for the season. This year I am hoping for bigger plats, for a bigger yield. .

20190317_075036So I am pleased that things are moving along. The warmer weather makes me impatient to get out there, so having something to do is a nice distraction. The snow is gone, the finches are changing colors, and in the mornings when I leave for work, I can hear birdsong. Now is also when I also start stocking up on supplies such as: fertilizer, copper fungicide for the squash, melons and cucumbers,  Epsom salts and calcium. I mix Epsom salts and calcium and give the beds with the peppers and tomatoes a good shot of that. That helps prevent blossom end rot and a number of other deficiencies they are prone to.  My raised bed soil is deficient in micro nutrients and last year I didn’t use nearly enough. I ended up having to foliar feed to treat symptoms and I would rather stay ahead of this time and have improved plant health in order to see increased yields.

20190317_074513That’s all I have to cover for now. In a few weeks I may update again, if some meaningful change has occurred. Until then, play for warmth.

2019 Rochester Garden Show


About this time each year, we here in upstate are pretty damn sick of winter.  Gardeners and outdoor enthusiasts more than most. Just when we can’t take it anymore, along comes an annual event that draws us like moths to a flame, and leaves us practically drooling for warmer weather, with our minds stuffed full of crazy ideas. Where did we get such fanciful notions?

The annual Rochester Garden Show, where else? The inside of a local indoor arena is turned into stone pathways meandering through some of the most fantastic and artistic landscaping displays you will ever see. Like a fashion show, designers throw out what’s practical, and instead show us what is possible. Displays of stone work, melded with water gardens, timbers, living walls, and much much more. And just when you think you have had enough, an area stuffed full of vendors with everything from hydroponics and tools, to seeds and statuary. So let me take you on a tour and show you what I love about this.

I will not attempt to go into detail on every single display. That would take a long time. Instead I will take you through my favorites, of which there were quite a few. The arena is round. So you have an outer ring of displays, then several throughout the center. This year’s theme was Enchanted Gardens.

20190315_103600


First up, was the display for the Monroe County Parks Department. Not something  I was expecting. However, after entering through a tunnel of birch and willow branches, I came across some very cool hand-made chars, a table and benches. As it turns out, the Parks employees made these, and there representative told me they were looking for a way to market them in order to fund projects. I thought that was a magnificent idea. No wonder why we have great parks with people like that.


Even though this is a Garden Show, the next display was actually requested based on the small display they did last year. The National Warplane Museum in Geneseo, New York’s Victory Garden. Last year they had a small victory garden display, hearkening back to World War 2, when people were encouraged to plant vegetables in order to help support the war effort. This year they added an iconic white picket fence, stars and stripes flying high and a larger garden. They also had a vintage Willy’s Jeep, and I got to register for a chance to go for a flight in a restored C-47 airplane that was actually used for the D-Day parachute drop. It was a touching display and just looking at it made me feel like I was looking at an actual 1940’s victory garden.

Right after that,  ran across an odd but cool piece by a company called GFNLA Plantgfx Gardenscape Pros (not exactly a catchy name). A giant stone throne/chair made for a giant, with a giant ax sunk into the ground next to it. Like Paul Bunyan himself was sitting there.

20190315_102532

I need this in my backyard. It’s just cool.

Fossil Rock Landscaping was up next. Their display was breathtaking in the level of detail, and that really made the design what it was. The display was titled  Enchanted Wedding Barn. It looked like something you would see in Country Living or Martha Stewart Living magazines. This was the People’s Choice Winner and Best In Show and I could easily see why. An open timber roof with nice natural looking stone, the structure was low, but that helped blend it into the surroundings. Country-style accent lighting, a really incredible dining area, and just behind the sliding barn door, an outdoor pub? They had me long before that, but that clinched it. If you had this in your yard, you would have nonstop garden parties, because …..why not show it off? It is by far, one of the coolest outdoor living designs I have ever seen.


I saw some interesting creations from  Westside Pro Landscapes, who used moss, woven sticks and flowers to create ladybugs, a giant dragonfly and a magical looking mushroom.


Next was the Fairy Land display. Fairies were snuck into displays, and while this didn’t have any, it was like you were walking down a long unused path in some old forest, and just stumbled upon this scene i a clearing.


As I finished my loop of the outside, the last display was the local Bonsai Society. The first part of the display was just a collection of Bonsai creations against a stark white back drop. It wasn’t exactly eye catching. But as you rounds the wall, it got much more interesting. Here under a stone and wood arbor, two gentlemen were working on some very cool looking specimens, and around them among the garden beds were displayed some incredible specimens. Comparing the first part of the display with the second part, really shows you why presentation is everything.


There was still more to see, and I have skipped over more than a few of the displays. I could write for days, and still not cover all of it. But I my intent is to just hit the high points.  So I will close with what was my second favorite display. A company I have never heard of called simply JOSH Landscape Company. Their scene titled simply Transcend was breathtakingly cool. High stone walls on the outside allowed them to slope down towards the stone path that led through the display. Huge trunks made of woven sticks and vines lighted on the inside immediately draw your gaze, and it gave it a very fantasy forest type of feel. But as incredible as it was, you couldn’t let that distract you from all the little details. Small deer topiary were hidden here and there, beautiful plant selection, and what I liked best, were the open books blooming from the landscape like flowers. It made the display like some literary dream world. Inviting you to come in and read in the garden. It was fantastic. I walked through it several times and every time  found something new.


After all that, I must admit feeling a little drained. It was a lot to take in. I wandered over to the vendor area and just cruised through that. Stopping to buy some variegated Caladium bulbs, a hydrangea and some spicy pickles from one of the food vendors. You can;t have an event without food, that just won’t do. It was everything I thought it would be and a little more. The awesome displays, the scent of new mulch and blooming hyacinth, and color everywhere you look sent me home with a smile. Something you don’t get much of this time of year.

I hope I could convey through word and picture just how excellent of a show this was, ad I look forward to next years being even better. My wildest dream is that somehow this inspires someone to start something similar in their community. Until next time…..

Blog at WordPress.com.

Up ↑