Tomatoes and Tilling

Tomato Status: Excellent

Despite the setbacks for the cold, the tomatoes are flourishing. They are almost a foot and a half tall. Color looks good. I removed all the yellowing, cold-damaged lateral stems.  I would say I am on track for where I would normally be this time of year, which is a little surprising considering the long, drawn out cold spring we have been having. But lot’s of sun and a few hot days and the tomatoes have bounced back in fine fashion.

Yesterday I weeded all the beds and gave everything the first shot of Espoma Garden Fertilizer. Today, I went through the plants and pinched off the small flower buds that were starting to set. It won’t affect the quality or quantity of the harvest. Plants can’t expend energy in too many directions at once.  So by pinching off the flower buds, the plant will shift gears to green growth instead of fruit production. More flowers will come, but until I think they are ready, no flowers. This is gardener’s version of responsible parenting. I also went through and removed all of the suckers where lateral shoots come off the main stem.  They can have a tendency to retard growth if left unchecked. And if you can successfully root them, they are a ready made plant.

20190602_162017

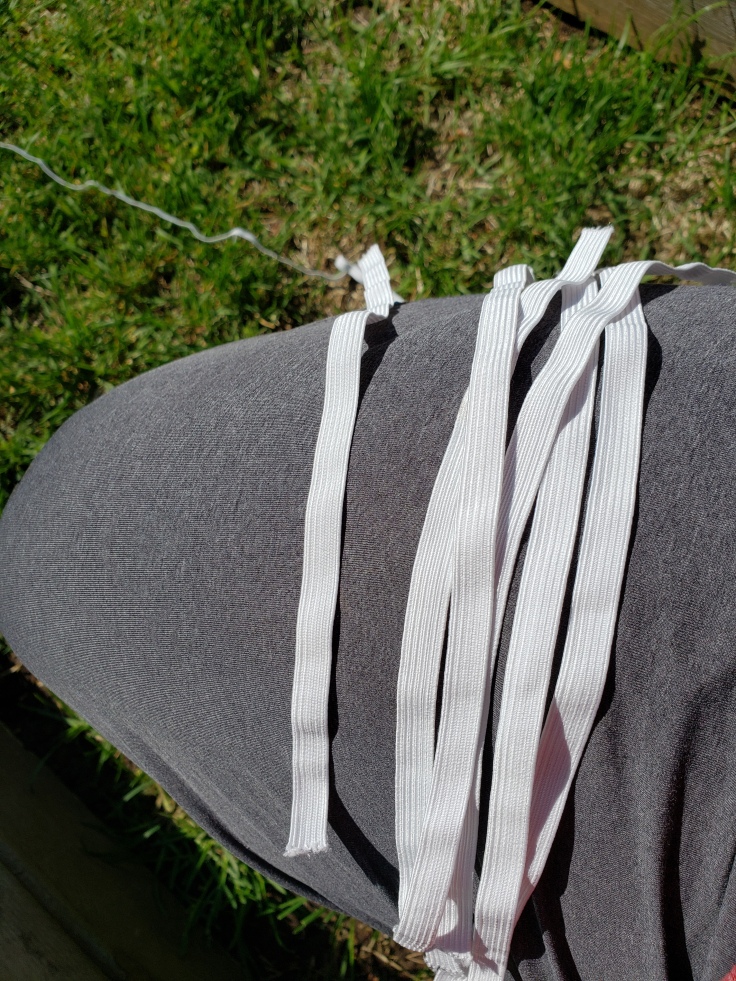
Today I also started tying up the plants as well. You have a lot of options with tomatoes. You can stake them, cage them, weave them o a wire, or just let them sprawl out. I choose to stake mine. It works better with square foot gardening. Over the years I have used a variety of tying options from jute twine to wire , electrical zip ties and kitchen twine. What I found last year was something that works better than all of that. Elastic. Just a plain old elastic band like the type you wold use for sewing. I bought a roll of 3/8 inch elastic at Walmart for just a few dollars and it goes a long way. I tie the stems loosely using a square know and leaving just a little room. As the stems thicken and move around, the elastic will stretch and flex with them without any damage. Especially when it gets windy.  It cuts and ties easily. The only downside is that you can’t compost it. So either you untie it and save it, or do what I do, cut it out with scissors at the end of the season and throw it away.

20190602_161429

To Till or Not to Till

Finally, I would like to close out by bringing up a topic I have seen discussed a lot lately. Tilling or working the soil. The current and trendy view is that this shouldn’t be done because it damages the mycorrhizae which exist in your soil, and in damaging them you hurt the soil as a whole over the long term.

fungus 1

The mycorrhizae are those tiny little fungi that inhabit the soil and latch onto your plant roots in a complex symbiotic relationship. Plants can easily absorb water, but not so easily absorb most nutrients. The mycorrhizae need sugars that soil doesn’t provide. Thus a partnership is formed. The fungi latch to the plant roots and help the plant absorb those nutrients and the plants provide them with sugar. This is the complex interconnection of nature in action.

The along come the humans. We break up the soil to some extent in order to make soil easier to work, add in amendments or simply to till under a cover crop. It all amounts to the same thing. Some amount of damage is done to the beneficial fungi. But I believe that extent is a bit exaggerated by the “no till” permaculture crowd. There are several reasons why I think this is true, but mind you these are theories based on what science I do know.

If you remove the plants, roots and all at the end of the season, you are basically cutting off the fungi’s food supply anyway. But don’t worry, unless you are sterilizing your soil between seasons, those fungi have inoculated your soil with spores. Spores which hang for the next season waiting for another plant to bond with. This will be especially true if you’re a heavy user of compost or have a garden soil already rich in organic matter. Rich, well drained soil will help the mycorrhizal layer quickly re-establish itself.

The “no-till” viewpoint gives too much credit to these fungi for being able to overcome terrible soil. If you have that dreaded heavy clay, or soil so sandy it holds water about as effectively as a colander, then you need to amend it, most likely for several years in order to get it where you want it. The fungi that help the plants don’t really improve the soil. That’s not their function. So in this case the benefits of tilling or mixing in amendments, far outweighs the damage done. Your fungal layer will more quickly establish itself the better your soil gets.

There are several fungal inoculants you can buy to aid you in re-establishing the beneficial relationship. I can’t speak as to their effectiveness as I have never used them. I would suggest trying it out o a small scale and see how that does versus a non-inoculated section. Where I can see these inoculants being most helpful is if you are starting plants from seed in pots or trays and you are using sterilized soil. The sterilization process may have destroyed any mycorrhizal spores present. The seedlings will not need these fungi when they initially germinate. But as they quickly mature and develop roots  here it will make an impact with faster nutrient uptake. In theory this could mean you enter warmer weather with bigger, healthier transplants who already have an established root/fungus relationship to bring to the garden with them. Hmmmmm. This sounds like something to experiment with.

That’s all for now. The warm weather is upon us. So get out there and enjoy it. A bad day out in the lush green beats a good day inside anytime.


Cold Spring: Gardening in Cold Weather

The official first day of spring was Wednesday, March 20th. By the weather we have been having, you would think it was yesterday. The cold, dreariness of winter slogged on. Sure the snows melted, and the ground thawed. But until recently, that’s about all we can say has happened. April was drier and colder than usual, leading to a bleak, cold and wet start to May. We have had a few days of promising temperatures so far. But this time  they seem like aberrations, rather than the gradual warming trend we see going into May.

May is usually that month where upstate New York gardeners are feeling confident about the danger of frost being behind us, and we wait patiently for a few weeks for our soil to get warm enough so that our seeds will sprout and our transplanted seedlings thrive. Not so much this year. The weather has been terrible. While we had a good day here or there, nighttime temperatures have been dipping into the low forties, and occasionally high 30’s. In fact as I write this, it’s expected to dip to 42 degrees tonight.

I had a ton of seedlings ready to go. I had pots with lettuce loitering around inside waiting to go out (the dog kept eyeballing them, she has a taste for romaine…). I had a transplanted fig and several raspberry plants that needed to get put in the ground as well. Only the weather was stopping me. I wasn’t too concerned about sowing seeds at this point. All of my slower growing plants, like peppers, tomatoes, kale and brussel sprouts were putting on size, and I had to transplant them from starting cells to 3″ pots.

So on a nice day last week, I decided to start the hardening off process. If you have never done this, it’s the process of giving plants started indoors time to acclimate to being outside.  Plants started under grow lights in stable temperature will burn up, die back or otherwise wilt when exposed to the harsh temperature fluctuations and glaring sunlight of the great outdoors.

So my plan was to put them outside during the day on nice days giving them a chance to adapt. After a few days of this, I made the decision that they were ready. My arrogance and impatience would prove costly. But I forged on anyway. The first cold night outside, I dug a pit in one of my raised beds, dropped a storm window over it for a cover, and housed my plants in the improvised cold frame. This is where it started to go bad. The first few days they were in the frame, it was clear and really sunny, but temps were barely in the 40’s. I wasn’t concerned because I had been monitoring the bed temperature and it was staying around 50. But I failed to consider the effect of the sunshine through the glass. Almost everything in the cold frame got scorched being under clear glass. Not fatal, but decidedly ugly.  Thankfully, they have strong roots.

Last weekend was sunny and warm. I took advantage of that to get all of my raised beds tilled, and with a few days of decent weather on the horizon I decided to plant my potatoes, all of my transplants, and sow the remaining beds. I mean it was 60 degrees, almost mid-May. Safe space right? So I removed my wretched looking transplants from, the improvised cold frame and got them into the ground. I figured this would give them a measure of protection. WRONG AGAIN.

The temperature snapped back down. We barely made it into the 50’s here during the day, and back into the low 40’s most nights. At this point I think the transplants were hardened off enough that they just accepted the suffering. Poor little things. They are ugly looking for sure, with their  scalded leaves and withered appearance, but they are gamely hanging on. As you can see below the next few days things seem to be picking up.

Resized_Screenshot_20190517-082329_NOAA_Weather_Free.jpeg

I am hoping that being planted in good soil, some warm sun, and decent average temperatures will snap them out of their sunburnt funk. A shot of organic garden fertilizer will help too. I will give the a few weeks to snap out of it. If they don’t I need to consider replacement options. On the plus side, my potato seedlings are already showing above ground., and I saw some bean sprouts this morning. My brussell sprout transplants appear to be indestructible. Not a mark on them. And above all else, my lettuce which has lived outside in pots for weeks now is loving life. In fact it’s doing so well, I started two more pots of romaine.

4367081b-02ca-45e7-87c4-8fc9dfc02418

This entire fiasco has taught me three things. First, I need to stop screwing around and build a few proper cold frames before fall. Second, I am considering black plastic to warm the beds faster, and to keep it on until late may with the transplants. Last, I need to be more patient. Not having a cold frame ready, I should have just made a home for everything in the unheated garage. It would have blunted the worst of the cold.

WELL, LIVE AND LEARN. Another update coming soon as things progress.

Spring relentlessly pushes forth and my green soul longs to keep pace.

Spring Garden Preparations Continue

I had such plans for last week and this weekend. Our growing season is short here in upstate NY. Because of that, savvy gardeners like to hit the ground running as soon as it gets warm enough. I have the normal list of stuff to do such as work the beds, transplant seedlings to pots, etc. Additionally, I have an ambitious list of outdoor projects that I want to get done as well before the growing season gets underway. Some items are necessities, some are “nice to have’s”. Either way, I need nice, or at least tolerable weather to get it all done.

Resized_20190420_100724

Towards the end of last week, it started to rain and got cold again. Not exactly what I wanted because I had taken apart the almost 100 feet (30 m) of vinyl picket fence that was slowly being pulled down by creeping English Ivy. This Ivy had been planted in the cedar hedgerow along my southern border and just left to it’s own devices for who knows how long before I bought the house. It grew through the fence and into the lawn, in the process applying so much downward pressure on the fence, that it shattered the plastic clips that hold the sections to the posts. My only choice was to yank the fence sections out, prune back the ivy, then reinstall the fence sections using new hardware.

I could have let this go, but I have a deer problem and a dog problem. Deer want in, dog wants out. So I decided to solve both by installing plastic mesh deer netting. This would make the broken down fencing inaccessible, so the ivy/fence issue had to be dealt with first. I was not kind to the ivy……if anyone tries to sell you on the idea of a few flats of Ivy as a ground cover or border, or anything, just know that it needs to be constantly contained. And it will grow underground and pop up in other places. So you think you have it under control but you don’t.

I was also anxious to upgrade my compost bin in order to take advantage of the debris from spring cleanup as a potential source of compost. But given the location of the bin, the deer meeting had to go up first. So as you can see the ivy and fence issues were in the way of pretty much everything. To top it off, the weather was wet and cold. I needed a better option, but waiting for one would not help.

No secrets here. I sucked it up every decent, passably dry hour I could find until I beat back the ivy, and got the fence back up. Slammed home a bunch of 7′ metal T-posts I purchased at Tractor Supply and hung that netting. Hanging deer netting is no fun. It snags on everything. At one point I was like a salmon caught in a gill net. But you need to be patient, careful and deliberate. I still have a few hundred feet to go, but the hardest part is done.

Resized_20190421_143029

That was enough to then allow me to build my new compost bin. I already had a 4 foot (1.2 m) by 4 foot square made of 2″x 8″ lumber. My goal was to use that as the base and extend up so the bed was 32 inches (81 cm) tall sides and back, yet only 16 inches (40 cm) in the front to allow for easier working. I built this monster about 10 feet from the beds current resting place. And I grossly underestimated how much this beast weighed when assembled. Pressure treated wood is heavy stuff, and only handling one cut piece at a time, I didn’t consider the overall weight until it came time to re-position it. That took a combination of brute force and ingenuity, but I got it situated and I am a lot happier. My co-workers have been donating coffee grounds and between that and the yard waste I will generate form cleanup, I have quite a few sources of carbon and nitrogen and I expect to create black gold with this new setup.

Resized_20190421_143011

During the wetter hours, I managed to get most of my seedlings out of the 6 packs and into some larger starter pots. Even though I re-potted my peppers, they are still sitting on heat mats for another week. Everything got a small shot of fertilizer as well. That will help with the transplant shock. But the hardening off process has begun. My Viollete de Bordeaux fig has started to leaf out, so I potted that and it now lives outside. Soon it will go to it’s permanent home in the yard.

All told, it was a productive weekend despite the crappy weather. Sometimes you just have to suck it up and will yourself to get stuff done. Had the weather been sunny and dry, I would have gotten the garden area mowed out as well, maybe gotten some additional deer netting hung. But I am happy overall with what I have so far.

Find your motivation, make your own Eden.

Let the thought of growing things move your hands to action.

Seed Starting Update for 2019

The seeds have arrived. The plans are drawn up. And last week the first stage of the 2019 garden season began. I started seeds! I knew how many plants I wanted this year, so I made my list, and selected things for early starting that I knew needed to be started indoors, or were something I may have had a problem with in the past. My secret weapon this year is heat mats. I should have used them last year, but I thought my basement was warm enough and boy was I wrong.

So this year I ordered some off Amazon. I planted a week ago, and what a difference. I already have seedlings. If you were considerering using them, I would highly recommend it. They don’t cost much and the results I saw speak for themselves. Before I get into what already sprouted, here is what I started:

  • Swiss Chard
  • Kale
  • Jalapeno Peppers
  • Ancho Chili Peppers
  • Sweet Chili Peppers
  • Chinese Giant Bell Peppers
  • Intruder Bell Peppers
  • Sweet Chocolate Peppers
  • Olympian Slicing Cucumbers
  • Calabrese Broccoli
  • Mango Hybrid Melon
  • Cherokee Purple Tomatoes
  • Brandy-wine Tomatoes
  • Sweet Cherry Tomatoes
  • Steakhouse Hybrid Beefsteak Tomatoes
  • Green Gem Brussel Sprouts
  • Tango Celery

Seems like a lot doesn’t it? But I only planted 3 cells of most of those. I scaled it back based on my notes from last year. There is still an entire group that will be sowed outdoors in May, such as Sweet Corn, squash, beans, basically the easy fast germinating stuff. This year, because I ordered seeds, potatoes and some plants, the order is staggered. The seeds came about 10 days ago. I expect the tubers next, then the plants (raspberries and a fig), and last will be the sweet potato slips.

Right now I have sprouts on the kale, chard, brussel sprouts, tomatoes and cucumbers. So I am looking for a cheap source of small plastic pots to transplant them into. They will develop better i pots then left in the starter cells, even though I use deep cells.

20190317_074459
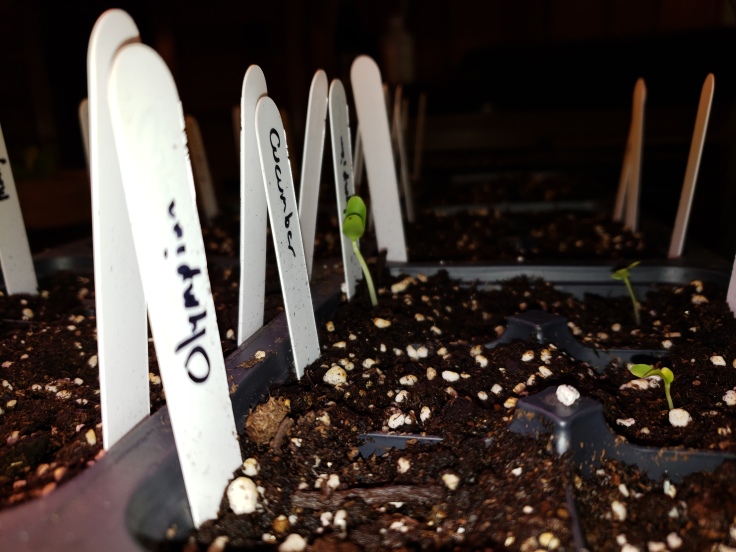
My enthusiasm seems to grow along with them. One thing I did notice is that the heat mats require more frequent watering. Not a lot, but noticeably more than last year. I am okay with that. I tend to it all daily, like an impatient, hovering parent. I expect in another 10-14 days, maybe a little less, I will start seeing peppers. Peppers were a hard spot last year. It took a log time because my basement was so cool. The plants were small when I moved them outside, and were stunted for the season. This year I am hoping for bigger plats, for a bigger yield. .

20190317_075036
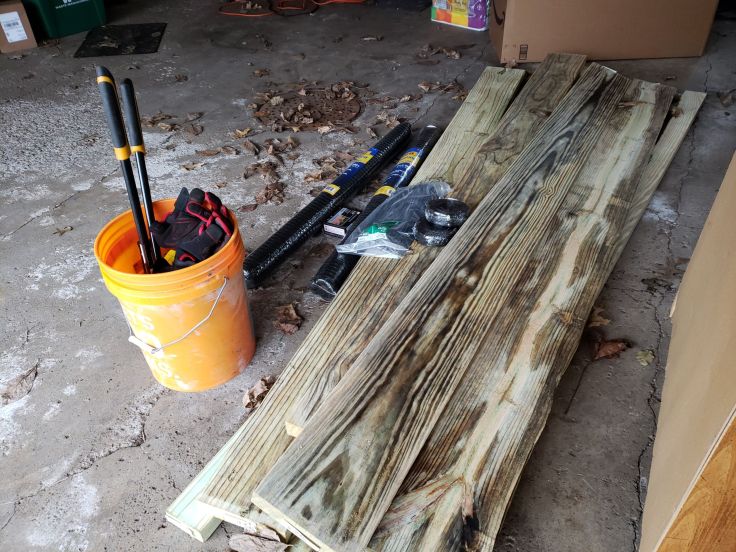
So I am pleased that things are moving along. The warmer weather makes me impatient to get out there, so having something to do is a nice distraction. The snow is gone, the finches are changing colors, and in the mornings when I leave for work, I can hear birdsong. Now is also when I also start stocking up on supplies such as: fertilizer, copper fungicide for the squash, melons and cucumbers,  Epsom salts and calcium. I mix Epsom salts and calcium and give the beds with the peppers and tomatoes a good shot of that. That helps prevent blossom end rot and a number of other deficiencies they are prone to.  My raised bed soil is deficient in micro nutrients and last year I didn’t use nearly enough. I ended up having to foliar feed to treat symptoms and I would rather stay ahead of this time and have improved plant health in order to see increased yields.

20190317_074513
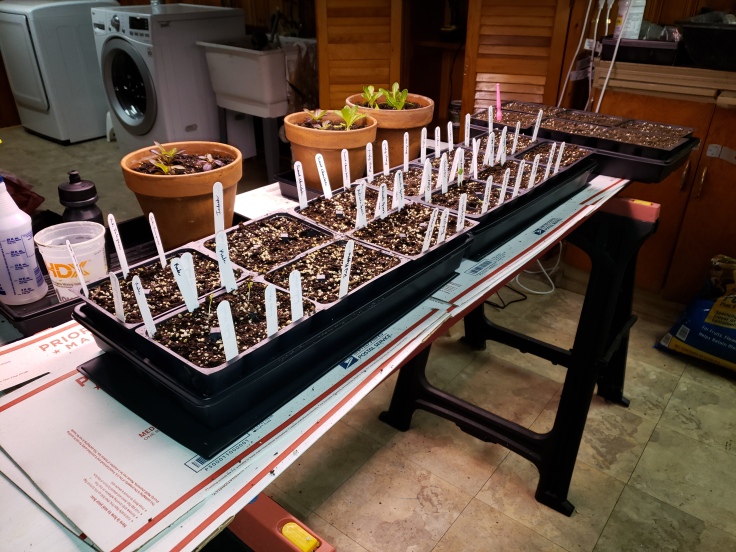
That’s all I have to cover for now. In a few weeks I may update again, if some meaningful change has occurred. Until then, play for warmth.

Mono Cultural Problems

Monoculture. My Plant Materials professor in college constantly warned of it and the dangers it brings. That same sentiment was echoed in my Integrated Pest Management classes as well. But my Landscape Design and Plant Propagation/Nursery Management professors were at odds with it. So what to believe? Is it good, or is it a thing to be feared?

This depends upon your school of thought. Monoculture is the cultivation of a single crop in a given area. In order to understand it and figure out how it fits in, and whether it is to be feared or not, is all a matter of perspective. So lets start with what it means on a residential level.

Elm-lined streets no longer exist thanks to Dutch Elm Disease

Landscape architects and city planners love monoculture. Elm lined streets were everywhere once upon a time. I can walk the streets of my neighborhood and count no more than 4 or 5 species of trees; Red Oaks, Silver Maples, Norway Maples, Honey Locusts and Plane-trees. The repetition lends a certain look and continuity to neighborhoods. Landscape designers favor it too. Every house on my street has similar shrubs, Arborvitae hedges, mature Rhododendrons…….and all that is fine. Until Dutch Elm disease wipes the shade form the neighborhood streets, Japanese beetles ravage the landscape, tar spot covers the colorful fall maple leaves with unsightly blights. You get the picture.

For you, the established homeowner, it gives you a heads up as to what to guard against. As a new homeowner, it is an opportunity to not have to suffer their fate. Monoculture draws pests. They go where the food is. The most food that will sustain the population. The denser the food/host source, the faster the problem will spread in that geographic area. Disease spreads right down the street with the wind blown rain, insects, wind, blowing leaves, etc. and you cannot stop the spread. It is almost useless to fight against it . As a home owner, you can spend thousands having you lawn treated, and your trees and shrubs sprayed to no avail. Because if the whole area isn’t on the same regimen, the pests or disease gain a foothold. Then the second you are off on your application timing, bang! Cedar apple rust, grubs, powdery mildew and all sorts of lovely and unsightly things come calling.

Recognize these? Everyone in my neighborhood planted them at one time. Why not? They look nice, they dampen road noise and they block your view of that junky whatever-it-is your neighbor has in her backyard. Alas, after a few years of harsh winters and overpopulation, the deer came calling to our neighborhood. With their preferred foods scarce, they ate their way up one block and down the next. They like the tender, new growth on the tips. Our mono cultural buffet attracted a herd of hoofed pests that to this day still come through nightly to see what’s for dinner.

So you homeowners need to be savvy. Plant a good mixture of stuff. Yes, you can use multiples of the same plant material. Before you consider it, see what your neighbors are battling and just choose not to have to fight the same battle if possible. Sometimes it means just switching to a cultivar that is more disease resistant to whatever the big problems are. And above all, a healthy plant is the best defense. So prune when you should, fertilize, make use of beneficial insects, try to use chemicals only as a last resort.

For you avid gardeners out there, take all that with a grain of salt. Gardening is all about monoculture. Modern agriculture gets by on it. Why? Because it simplifies things. For large farms, it limits the diseases and pests one has to deal with. It’s less farm implements required for planting and harvesting, it simplifies the economics and cost analysis and a number of other things. In short, you need it. That is not an excuse for not using Integrated Pest Management principles, or crop rotation, disease resistant strains and other sound practices. Rather, it’s an incentive if one wants continued success.

For you smaller, more realistic gardeners and homesteaders, you have other concerns. First, when possible select plants that are resistant. Be aware of what your neighbors are planting. A community garden group is a great way to do this, but I will expand upon that more in a post coming soon. Also, as an excellent free resource, do not overlook your local extension service. They generally track the bad stuff they are seeing in the area and can be a good form of intelligence against a coming invasion. They also offer practical solutions and their master gardeners are experienced and always willing to help.

Monoculture isn’t as big a problem for the gardener as it is for the commercial farmer, but to a smaller extent it can be a problem. Don’t settle for just one crop, which most of us don’t. I love tomatoes, but I don’t want to defend my entire backyard against horn-worms. So I plant a broad variety of things. And switch stuff up year over year. Including locations. Some things aren’t that mobile and moving to a new spot entirely may disrupt the process enough to break the cycle. Last year I had a problem with powdery mildew, mainly because I planted enough squash and melons to support a small country. This year, I moved their location and have scaled it way back to make the mildew easier to control. The general idea is to make it as difficult as possible for anything to gain a foothold. And remember, a pest, or disease may jump from one type to another. Japanese beetles don’t discriminate, neither does powdery mildew.

So there it is. Monoculture is a different problem based on your particular perspective. So be forewarned, think ahead and avoid it when practical. I would rather you plant nice shrubs, keep a nice lawn, grow huge tasty veggies for you. Not for deer, grubs, anthracnose, mildew, cucumber beetles and so on, and so on…..

Keep growing, keep enjoying.

Basement Lettuce

So I am sick and tired of Lettuce recalls. That’s how this whole thing got started. Remember earlier this year? The great Romaine recall? Well, welcome to modern agriculture. This is what happens when you have centrally located super-farms busy mass producing all manner of agricultural products, sharing water sources with other farms. Gut bacteria from animal waste gets into the water supply. That water gets spread around….and poof. E.coli is added to your nice healthy salad. Now I am not slamming modern agriculture. It does much good and this is an unfortunate by-product. But we can do better.

Well, after weeks jonesing for salad (worse because we couldn’t get any romaine and my local Panera stopped selling salads), I said enough is enough. I am a horticulturalist and avid gardener. I have grow lights, trays, starter packs, potting mix and lettuce seeds. So why am I not growing my own? Well, I am now.

That’s right, in the bowels of winter, in my not so well heated basement, I started some lettuce seeds. My intent is to grow my own lettuce pretty much year round. I do not have a greenhouse or sun room. So I will have to make do as things progress. I started the new category that you find this post in, and that is where I will post periodic lettuce updates so you can see my success and hopefully very few failures.

Salanova Red Butter Lettuce

So after just a about a week ad a half, I had some respectable lettuce seedlings. I let them go for a few more weeks until I could transplant them into pots. Here they will stay. I made sure to plant them far enough below the rim, so I could cut them just above the crown. That is far off, but this “cut and come again” method will allow me to keep harvesting them for quite a while. When the nights get warmer in early May, I will move them outside. Lettuce is pretty cold-hardy. So a late freeze doesn’t scare me too much.

If this works I will keep it going, starting new seedlings, the transplanting into pots. The benefit of pots is I can move them to shadier areas in the high heat of summer to reduce bolting.

Dragoon Romaine

All in all, I am excited at the prospect of nearly year round fresh lettuce. Obviously to get any quantity, I will have to expat the operation. But right now I am happy with the 9 plants I have and if I rotate what I cut , water and fertilize wisely, I should get fairly regular and consistent harvests.

Well, that’s it for right now. I will post another Lettuce update in a few weeks. These pictures are over a week old, and the plants are now starting to flourish so the ext update should show quite a bit more development. In the mean time, keep finding ways to be green. And to those of you who have subscribed since my past post, thank you. As time allows I will come check out your content and return the favor.

2019 Garden Plan….at least I hope it will be.

As I mentioned in an earlier post, one of my goals for the winter was to do the advance planning for my vegetable garden. It’s nice to do it now rather than in the rush of spring. I have time to look at my journal from last year (yes, I keep a planting and harvest journal) and see what worked and what didn’t. Before I get into what I hope to have in store for this year….a little background is in order.

In the Beginning….

We moved into our current house in August of 2016. The big back and side yards were part of what attracted us to it. I immediately declared the south side of the house, a section hidden by fence, as the new “vegetable garden area”. The whole area is maybe 20’x 35′. It gets sun all day, but due to the mature cypress hedge on our southern border, part of it is sightly shaded. It was too late for a garden that year. So I sat, and I waited. Plotting and scheming the whole time. During that wait, I fell in love with the concept of Square Foot Gardening. At our last residence, I ignored conventional row gardening anyway and packed everything in as dense as I could, as a result I had some great yields. So this seemed like a logical step forward to me.

Spring arrived and I came out of the gate hard. I built nine raised beds, 3’x 6’x 8″ out of pressure treated lumber. I used fence boards to make it more economical as they are pretty cheap and the beds wouldn’t be that high, so sides collapsing wasn’t a concern. And I ordered up a load of topsoil. Here is where it went bad. The topsoil was nothing more than this real fine, screened clay. I cut it with compost and as much organic matter I could get my hands on. But it wasn’t near enough. That first season, I had serious compaction and drainage problems. Everything was stunted and only a few of the real hardy things did well. I was expecting some problems, just not to that extent.

Next season I added manure and raised bed soil to all the beds and mixed it in as much as I could. I also noticed last season that the beds have a nice worm population which I took as a good sign. Things were much better last year. I planted a ton of different stuff. I had zucchini and cherry tomatoes in such quantity, that I was sick of them long before the season ended. I started a bunch of stuff inside from seed and that gave me a nice jump on a few things.

This time around

So here we are in 2019. What is my plan this year? This year I am going to start replacing a few of the beds with something a little more hardy. I plan to keep the same size as it is good for working. I just want to use some sturdier lumber and build some cold frame tops for a few of the beds. As for Square Foot Gardening, I am going to stick with it, but ease back on the density just a bit. Especially with beans. I think it will help improve yield. I also plan on adding more organic matter to all of the beds this year. probably more raised bed soil and maybe a little composted manure.

I plan on having a good variety of stuff again this year, just at a more manageable level. So here it goes:

Green Beans and Yellow Wax Beans: I will plant half a bed of each. I prefer bush beans to pole beans, just easier to work with. The dog does too, because she likes to steal them when I am not looking. I have a lot of “Provider” Green Bean seed left over from last year. So I just need to buy more yellow. And I will stagger the plantings by a few weeks.

Red Butter Lettuce and Romaine Lettuce: I had these in beds previously, this year they go into pots on the deck. Too many critters having their way with them last year. Plus then in the heat of the high summer, I can move them to partial shade to help get a handle on bolting.

Swiss Chard: I suddenly can’t get enough of this. I planted Rainbow Chard last season and it went nuts, and I went nuts for it. But I will scale it back to three plants instead of the six I had last season. Not everyone feels the same way about it as I do so I had problems trying to give away the excess.

Zucchini: Okay, so last season I had about 6 plants…..I didn’t have the heart to toss the extra seedlings so I found them a home. My freezer is still stuffed with vacuum sealed bags of zucchini. This year…..1 plant. Maybe a second later in the season, we will see.

Yellow Squash: See Zucchini…..same story just a different colored vegetable.

Potatoes: One of the beds I plan on re-building is the potato bed. This way I can make it deeper. I plan on half a bed of Pontiac Red and half a bed of Yukon Gold. Last year I got a lot of earlies which was great.

Tomatoes: I have been a tomato junkie since I was little. I love them. I planted a few oddballs last year just playing around and grew a lot of Romas. This year I plan on scaling it back a little. No Roma. Just Cherokee Purples, Sweet Cherries and some Brandywines. I am also trying a new seed by Burpee, called “Steakhouse Hybrid”. It’s a giant indeterminate Beefsteak type with fruits upwards of 3 pounds. I like odd things, what can I say.

Cucumbers: These are my wife’s favorite an one of mine. I grow them every year. This time I plan on trellising them in a bed along my deck. I have doe it before with decent success.

Peppers: I tried a ton of different varieties last year. I had great success with Aji Dulci’s, but I will not be repeating that. I gave most away. This year, Green Bells, Red Peppers, Ancho Chilis, Jalepenos and a variety I discovered last season called “Sweet Chocolate”. Dark chocolately flesh, very sweet.

Kale: I have been growing Tuscan Kale for several seasons now. I does great in upstate New York. It really gets it second wind in the fall with the cooler nights.

Broccoli: I haven’t had a lot of luck with it the past few seasons. This year I plan on just a few plats, but growing them in pots . This way if I fail again, I haven’t wasted precious bed space.

Carrots: The bed for carrots is the second bed I plan on re-building this year. For the same reason as the potato bed. I want more depth. Like the beans, I will stagger the plantings a few weeks apart. They store good in the ground, but they are vulnerable when out there. So I would rather have a fresh batch every few weeks and take them direct to table.

Corn: Last year was a corn fiasco. I started a batch inside. Got the seedlings outside and they never really progressed. So I started over from seed. Good germination and the corn got about 5 feet tall, then the wind storm came after a few days of heavy rain and put a hurting on it. On top of all that, the deer ravaged the corn patch. So….fencing this year. Plus some tall stakes and guide lines to keep the corn straight.

Delicata Squash: I am trying this out for the first time. My plan is to grow it in this huge pot I saved from a fruit tree I bought. I am a huge squash fan and everyone raves about these. Plus,they are pretty pricey if you want organic. So I can hopefully get a good yield and feast cheaply.

Melon: I am trying a new hybrid of cantaloupe called “Mango hybrid”. I have a little spare bed space, so I plan on giving it a lot of room and see what it can do.

Brussel Sprouts: I may try these….not sure yet. I have been eating a lot of them lately, so I thought why not give a stab at growing them?

And although not vegetables, I plan on adding some Blackberries along my southern fence. It seems like a good use of space and I love blackberries. Hopefully my blueberries will come back a little harder this year too. Last year they performed poorly.

Lastly, I found a northern hardy fig. It’s a bush, not tree,, and I have a spot in full sun in the back yard where I have the remains of a stump to pull out. This wold be the perfect spot for it. It’s a variety called “Violet de Bordeaux”.

So that’s the plan. Seems aggressive doesn’t it? It’s a lot of growing in a little bit of space, but that is the essence of what suburban gardening is all about. How much can I produce? If I can make the soil a little better and fertilize when I am supposed to this season, who knows how much I will get. I do keep a harvest journal. I weight everything as I pick and compare it to what it costs at the local grocer. Last season I grew just under $400 worth of produce. This year I want better yields, and my goal is $600 or more.

So that’s it. Any thoughts comments or experience would be appreciated. I enjoy hearing the wisdom of others. I would rather learn from your mistakes whole I have a chance. Just like I invite you to learn form mine.

Up Next, The Great Winter Lettuce Experiment…..

An Introduction is in Order

Welcome to my re-purposed blog.

Previously, I was just posting about random stuff, trying to have a purpose….and it just wasn’t doing it for me. I like to write. But, I like to write most about things I am passionate about. That was the driving force for the re-purposing. The whole time I was blogging before, it felt too much like work. Like I had to keep doing it, but I could never truly answer the “why?”.

Now I feel I can.

I have always had an interest in the outdoors, gardening, landscaping, and horticulture in general. I went to college and studied Ornamental Horticulture and Landscape Design. I spent tens of thousands of hours working in Garden Centers, home improvement garden departments, nurseries, commercial landscaping, and consulting. At one point, I even found time to have my own landscaping business. Even after all that, there is still a enough I don’t know to fill a set of encyclopedias. The green world is vast, and even a lifetime spent in it, only shows you a very narrow piece.

Here is my space to share my piece with you, and hopefully you will share a little of yours. Bringing the green world into our lives makes us happier, healthier, more self-sustaining, and builds a better word for the rest of us. A greener world is a better world by far, and no one could really challenge that statement. Don’t think this means I am advocating for getting rid of cars or plowing under civilization only to return the modern world to pasture. But I feel we can integrate the green world into our little corners of civilization and sort of “take the edge off”, if you will.

I plan on covering a range of topics, from product reviews and gardening tips, to more educational stuff like soil science, design elements, site selection, common landscaping problems, and sharing my landscaping and gardening trials and tribulations. In return, I would love it if people would comment and share their experience, advice, etc. With my education and experience, I am still by no means an expert compared to some. Everyone should bear in mind that I live in upstate NY. So my preferences and experience are based around being in USDA zone 5/6.

Even though we are staring winter in the face here, there is still much to do and even more we can talk about. All winter long we wait for spring, then when it comes we never seem to be fully prepared! But we love it all any way. So welcome. Pull up a seat

Create a free website or blog at WordPress.com.

Up ↑